
 I'm back into the wonderful state of Idaho and have said my goodbyes to the Aspen Farm family. My time as a working student has come to a close after three years with some of the best people, it was not easy to do but luckily for me I am always welcome back and I'm sure I will find my way back to Washington before I know it.
The past few weeks have been pretty busy, working and getting ready for the last event on the farm had left Joe and I with not much time to prepare for a fall adventure. Which (drum roll please) we have decided to do a US road trip that is mostly climbing based. With that being said we decided to take the most trusty steed we know, that is the 1999 Suzuki Grand Vitara with 160,000+ miles on it- my first and only car. The car is solid (knock on wood) great in snow, ice and is reliable. Will be perfect for pot hole filled forest service dirt roads and becoming our mobile humble abode.
Now the Suzuki is no Classic Volkswagen Van but that doesn't mean we shouldn't give her some credit. We've had to get creative (mostly Joe) but the modification process really took hold after the event and taking advantage of the facilities at Aspen we started to build our Mobile Humble Abode.

 I really wasn't much help in this whole process, Joe is much more handy than I am but I will try to do my best to explain in the most knowledgeable way I can.
We started in the most logical way and that is ripping out the back seats. We knew that the back of the car wouldn't be long enough for us to sleep in it without the front seats either laying down or going completely forward. Which in the end actually doesn't matter but Joe measured out everything and started by putting in the base and biggest weight bearing part of the frame. Its about 6 inches tall in the back with more as you get close to the front of the car as the floor of the car dips down where the seats use to be.

When ripping out the seats we also happened to take out the compartment over the emergency brake that had the cup holders. Yes, the Suzuki HAD cup holders but one thing she always lacked was an armrest in between the seats. Which the lack of a place to put your arm happens to be more annoying than not having cup holders, so those left and thus an armrest was created that also doubles as a support for the plywood that is just behind the seats for when the car is in sleep mode.

Next was the smaller support that runs across the middle of the car and helps create the two storage bins that will be key for holding our things. Then on the outside of the front seats you will see two supports that will hold the plywood for when the car is in sleep mode. The supports go to the door side of the seats but also have legs that go to the floor of the car.

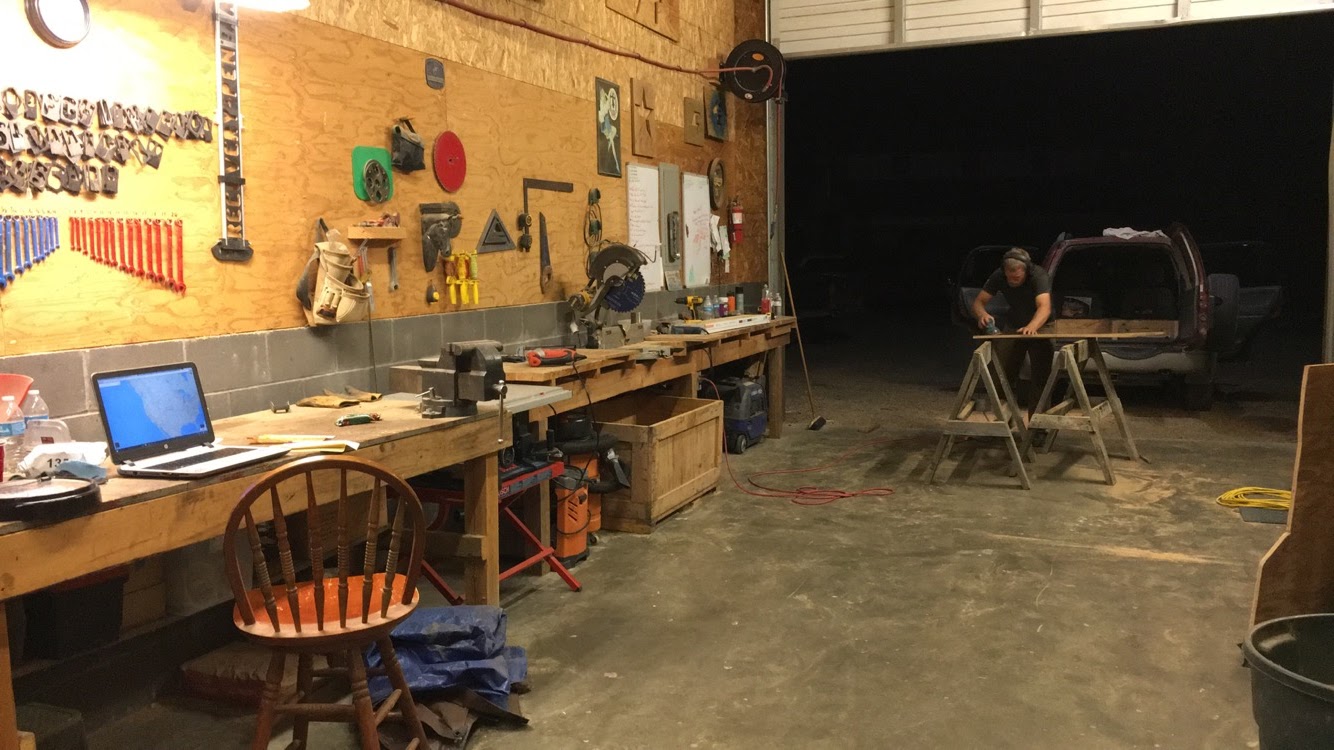
 Here is a great picture, with the greatest carpenter in the world smiling as his work starts to come together after just putting in two side supports that trail to the back of the car, again they will support the plywood that will overlay the top plus these also frame the space for more storage, preferably drawers that will be installed when its all finished.Then to the right the finishing of the supports get installed and the middle storage bins have been closed up on the sides where the doors are at, making access to the storage in the middle only available from the top, where cut outs in the plywood will go. But makes it so nothing in the bin will fall out the sides when the doors are open. You'll also see in the picture on the right the boards that are screwed into the bolts where the seats used to connect. The only actual part of the frame that is "connected" to the car. Simply making it that much more secure that the frame wont move. Though the frame is quite solid even without the bolts, it makes for a piece of mind.
 With supports in place and plywood cut the top of the bed is ready to be placed! This part of the frame sits directly behind the two seats, is screwed directly into the wood and wont be moved when the system is in drive mode or sleep mode.
Here the plywood is set and you can see the two openings for the middle storage compartments. Which now have lids that are easily removable. You can see where the drawers will go that are in the back of the car. In the front of the car, the drivers side is in drive mode and the passenger side is in sleep mode. The piece of plywood on the right side is easily moved for quick adjustment from drive mode to sleep mode and vice versa . The seats can either go forward like it is shown in the picture or they can lie completely down underneath the frame, you just have to take the head rests off.

 |
| PC JDStylos |
 While I couldn't be much help with the process of building our humble abode I did spend hours of looking up climbing places around the US. The first thing people ask us when we tell them that we are going on a climbing road trip is "Where are you going". We usually tell them is that the plan is no plan. We are going to go by word of mouth and see where we end up. I wrote down a ton of places I have found from state to state which will be a great reference but the idea is, is to feel no pressure if we decide to stay somewhere longer than originally planned. Just today I was talking to a girl from the climbing gym from New Mexico who told me about 5 different places to climb down south and the more I talk to people and the more research I do the more I see that the possibilities are endless and you could probably spend a lifetime going from place to place. Even though we plan to be on the road for a few months, I doubt we will be able to hit all the places we want to go.
We finished about 85% of the Suzuki modification and then packed her up and made the 9 hour, 386 mile drive south from Yelm Washington to Meridian Idaho. Where we are spending a few days decompressing after a lot of work and long days. Joe heads out for a couple more weeks of work on the east coast while I stay in Idaho and then he will return and we plan to hit the road in the beginning of October. One thing I realized while I was in Central America last fall was the fact that I literally have never explored my own country and I am so stoked to see it in the best way possible, by hitting the road and getting outdoors and climbing. Whether it be on rock, ice or just sitting around and enjoying the view there is no better way to see new things.
I am hoping to be able to blog along the way and keep everyone updated. But until then, here is a picture of our road trip mascot Jacob, testing out the ropes in her driving spot on the way from Washington to Idaho this last weekend. If you have any recommendations on places to go and things to see PLEASE share!
